Q. How to do mapping in Dynamics for populating the fields?
You can see how the "Mapping" is done by following the below video as well -
For example, you can use field mapping to create a new contact record for an existing account or a new sales opportunity for an existing lead. By specifying the relationship between the records, you can select the relevant fields, and the required data is automatically copied from one record to another.
Mapping can be achieved by using javascript as well but in general, field mapping is faster than JavaScript because it is a built-in feature that runs automatically without requiring any additional code. However, the speed of field mapping may be affected by factors such as the complexity of the mapping, the number of records being mapped, and the performance of the underlying system.
Common steps for Setting Up Field Mapping in Dynamics 365 (scroll down to see the real-time mapping with snapshots)
Step 1: Identify the source and target fields. The first step in setting up field mapping is to identify the source and target fields. The source field is the field that contains the data you want to copy, while the target field is the field to which you want to copy the data to.
Step 2: Create a mapping relationship. Once you have identified the source and target fields, you need to create a mapping relationship between them. To do this, navigate to the entity where the target field is located and select "Field Mapping" from the "Related" drop-down menu.
Step 3: Configure the mapping settings. In the field mapping configuration page, select the source entity and the target entity, and then select the source and target fields that you want to map. You can also configure any additional mapping settings, such as filtering or data conversion, as needed.
Step 4: Save and test the mapping. Once you have configured the mapping settings, save the field mapping record and test it to ensure that it is working correctly. You can do this by creating a test record and verifying that the data is copied correctly from the source field to the target field.
Advantages of Field Mapping in Dynamics 365
Time-saving: Field mapping eliminates the need for manual data entry, saving time and improving productivity.
Data accuracy: By automating the data entry process, field mapping reduces the risk of errors and ensures data accuracy.
Data consistency: Field mapping ensures that data is consistent across different records and entities, improving data management and reporting.
Customization: Field mapping can be customized to meet specific business requirements, providing a flexible and adaptable solution.
The following rules show what kinds of data can be mapped-
Both fields must be of the same type and in the same format.
The length of the target field must be equal to or greater than the length of the source field.
The target field can’t be mapped to another field already.
The source field must be visible on the form.
The target field must be a field that a user can enter data into.
If the fields are option sets, the integer values for each option should be identical.
Address ID values can’t be mapped
If you need to map option set fields, I recommend you configure both fields to use the same global option set. Otherwise, it can be difficult to keep two separate sets of options synchronized manually. If the integer values for each option aren’t mapped correctly you can introduce problems in your data
Conclusion
Field mapping is a useful feature in Dynamics 365 that simplifies the process of data entry and improves data accuracy. By following the steps outlined in this post and considering the advantages and limitations of field mapping, you can create an effective mapping solution that meets your business requirements and enhances your productivity.
Implementation of mapping steps-
1. Go to the advance setting in Dynamics 365 and open your solution or customizations.

2. Expand the entity whiche2. Expand the entity whichever you want to do the mapping (e.g Contact). Click on 1:N or N:1 relationships and find the related select the related entity (e.g Lead) and open that by double clicking.

3. Click on mappings

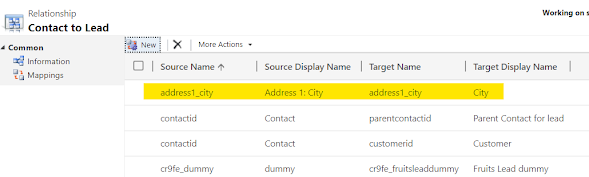
4. Here all the mapped fields from contact to lead will be shown as below. Click on the new button to create a mapping of any other field, and a new window will appear.

5. Here, we have two tables. Contact fields are on the left table and Lead fields are on the right table. Select the field whichever you want to map from contact to lead and click on the okay button. I’ve mapped First name, last name, Job title, and Fruit fields from Contact to Lead.
Note- Both fields must be of the same type, size, and the same format

6. Once you click okay then the new mapped fields will be shown on the mapping page. Now click on the save and close button
Remember to keep these fields on the form of both contacts and lead to collect and map data
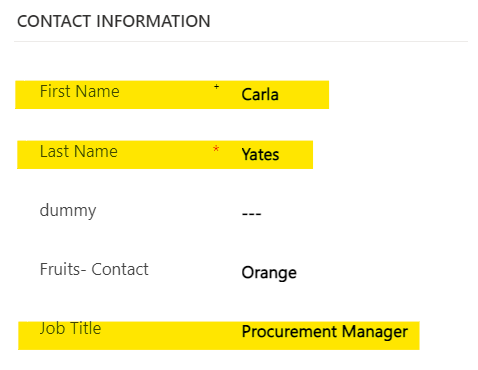
7. Go to the sales trial page, create a new contact, or open any existing account(e.g. Carla Yates)

8. Check the first name, last name, job title, and address one field value. If the field is empty then enter any value and save the contact.
9. Go to related and click on lead

10. Click on the new lead button. Now, this lead form should have prepopulated value for first name, last name, and job title as shown below. I’ve mapped one dropdown field called Fruit as well from contact to lead. Check step 8 for comparing

You've successfully done the mapping. We will learn more on this in next blog with complex mapping topics till then thanks for reading


No comments:
Post a Comment