Q. How to Integrate DocuSign with Dynamics 365 for signing and sharing the documents?
In this blog/video, how to Integrate DocuSign with Dynamics 365 -
Document-signing (DocuSign) software is a technology that lets you sign documents online. It uses an electronic signature and requires no paper, printing, scanning, or faxing of your documents. It is document-signing software that you can use to legally and securely collect approvals online in minutes. Used to replace lengthy manual signing processes, e-signatures speed the agreement process and maximize productivity.
Advantages- Ease of use, Cost savings, Time savings, Security, Integrations, Collecting payments, Revenue boosts, and so on.
UseCase Scenario- We need to get the signature of different persons from different departments or organizations with their details followed by order by enhancing the document security like code verification and OTP verification from the user.
Steps for Creating DocuSign Account
Follow the below link to create a DocuSign account, fill in the details, and click on get started
Link - DocuSign Developer Account

You’ll get a mail on your account for the activation. Activate it and set the password.
Integrating DocuSign with Dynamics 365
Open Dynamics 365 and navigate to Setting→Customization→Microsoft AppSource

Type Docusign for Dynamics 365 in the search bar and click Get it now. (Accept the terms and conditions).
The installation will begin and it may take some time to complete.
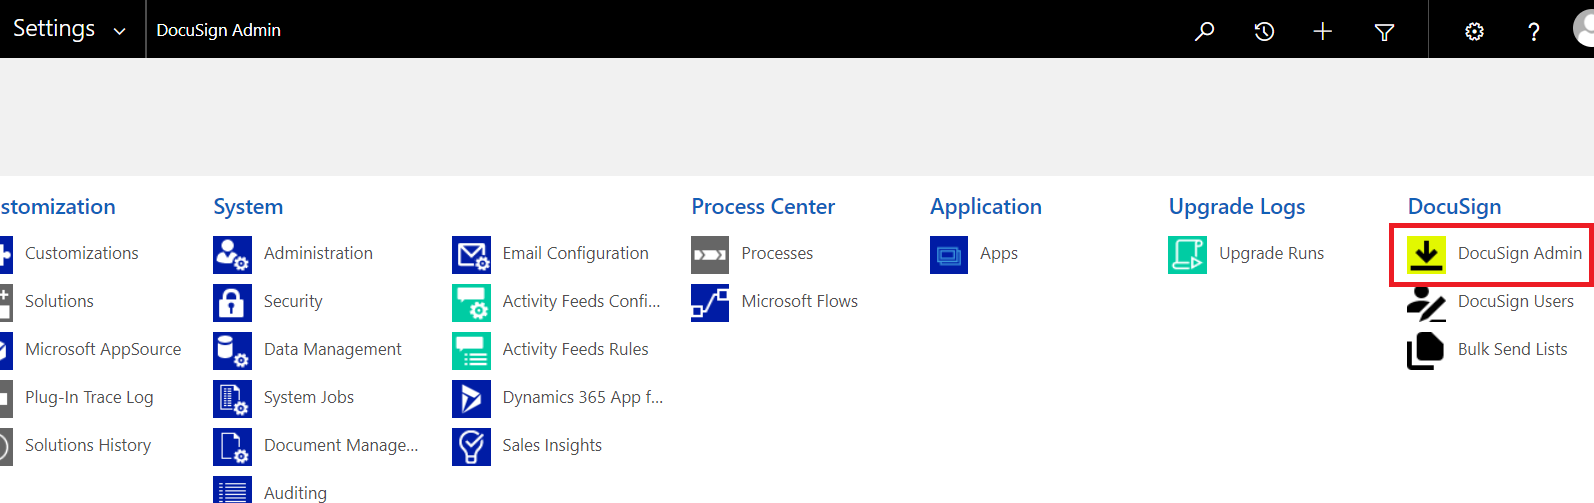
Go to Dynamics 365 Setting, and the DocuSign tab should be visible. Click on DocuSign Admin, and you’ll be redirected to the DocuSign website.
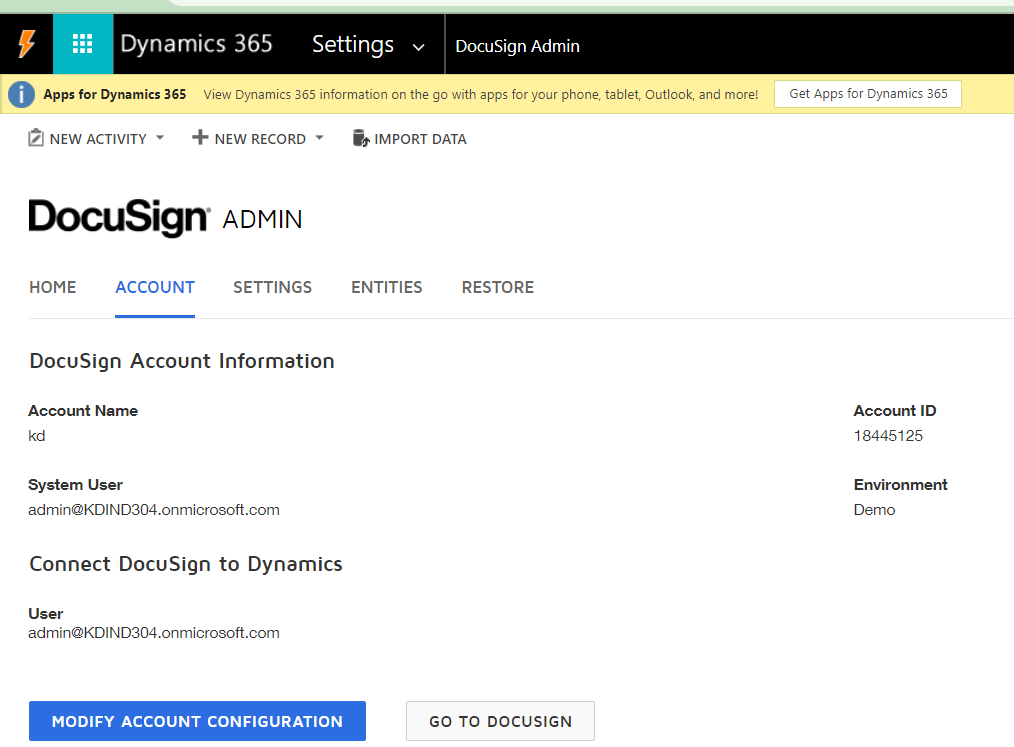
Fill in the credentials and choose Demo from the environment dropdown. Always select ‘Demo’ if your environment is not licensed or paid. Click on the Login Button, and you’ll be redirected to the DocuSign site for account and settings

We’ve different tabs available in DocuSign like home, account, entities, and setting
Account - you can check your account details and environment
Entities- We can enable/disable DocuSign for all entities here. The checkboxes should be checked as shown in the below snap

Setting- we can configure document naming, and email settings, and modify account configuration here

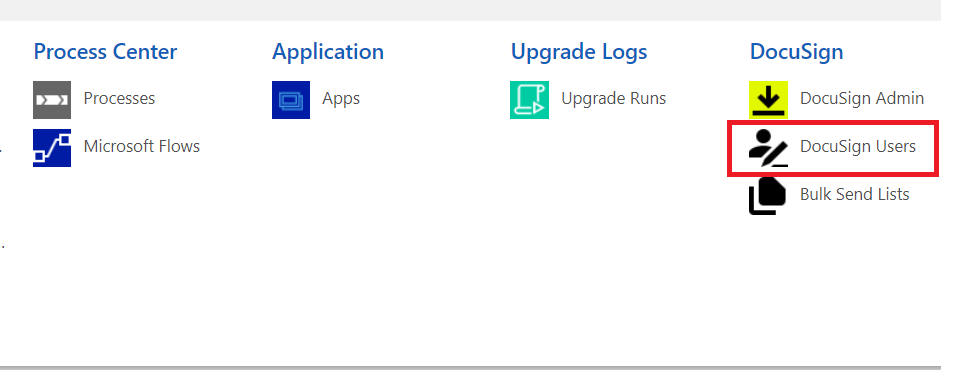
Now, go to Dynamics 365 Settings, Click on DocuSign users under the DocuSign tab.
Click on the new button and fill in the details of the user. Click on the Save button.
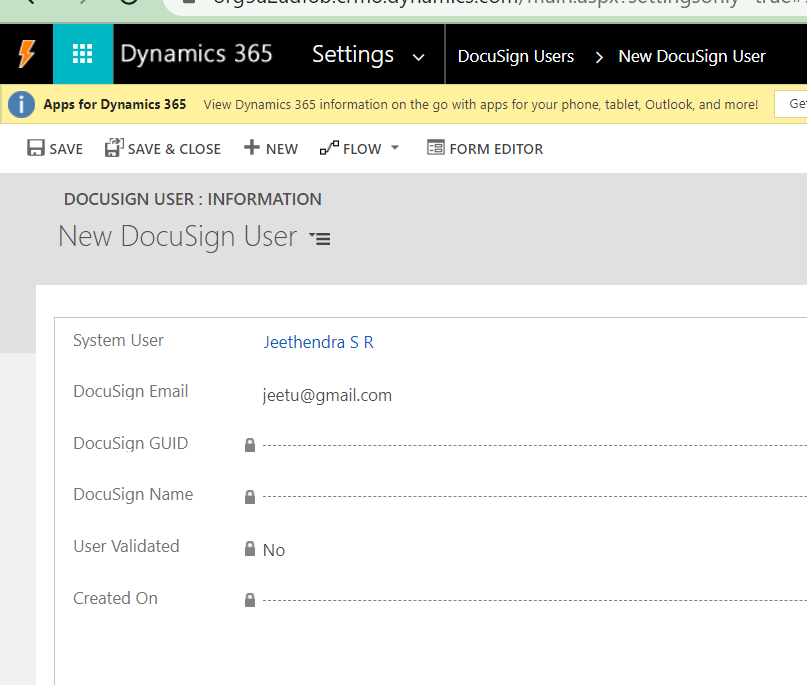
Click on the user, then manage roles and assign the security roles of ‘Docusign Trace’ and ‘DocuSign user’. Click on ‘Save and close’. The user will act as a DocuSign user and will be able to do the modifications.

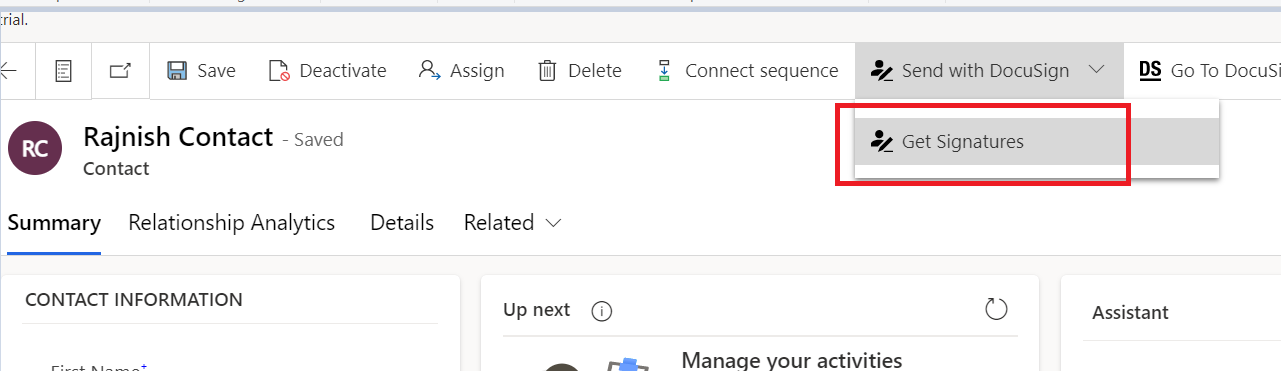
Now, go to your environment and open any entity record for which you’ve enabled DocuSign (step 7) e.g. Contact.
Two ribbon buttons, "Send with DocuSign” and “Go to DocuSign” should be available in the form command bar.

Send with DocuSign-get SIgnature: This button will allow you to send the documents for getting the signature of the recipients.
Go to DocuSign: This button will navigate you to the DocuSign website. Here you can create different templates, and check all the sent documents' status, dashboards, and so on.
To send the documents for signature, click on ‘Get Signatures’.
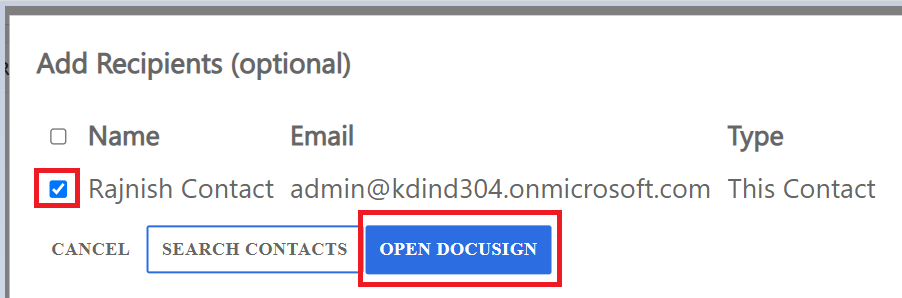
The opened record (e.g. Rajnish contact) should contain an email address to move to the next step, mark the checkbox and click on open DocuSign. You’ll be redirected to the DocuSign website.
Note -You can also put contacts from the search contacts option.
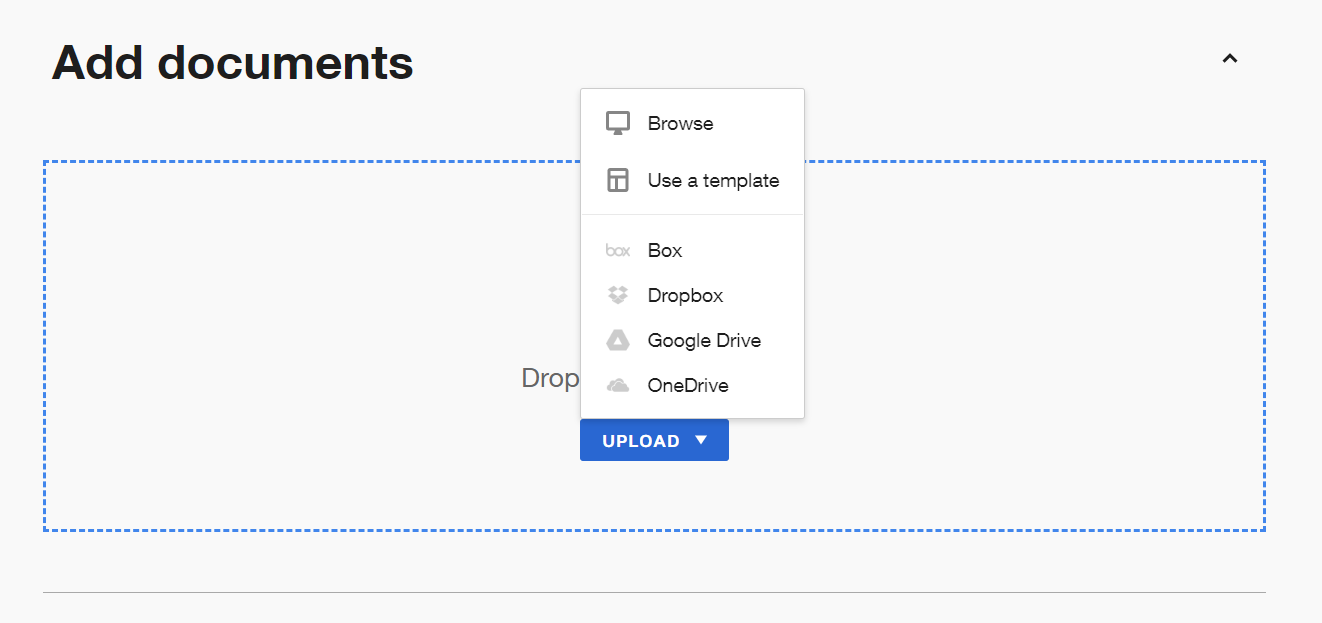
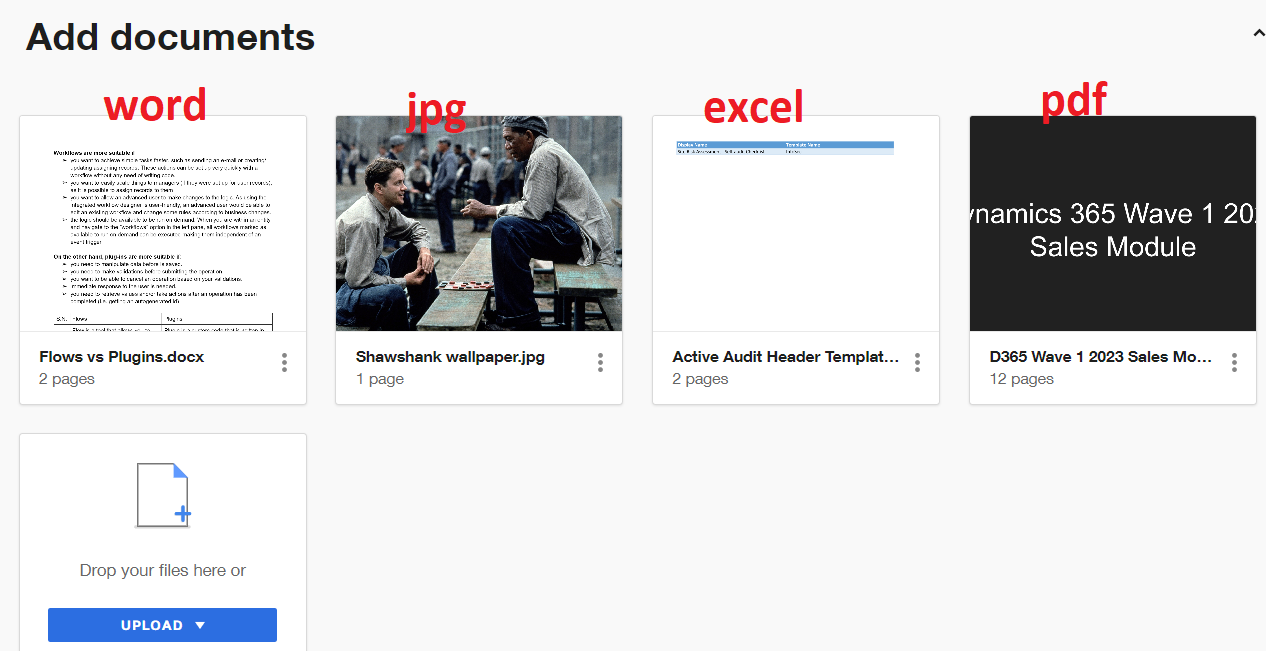
Click on the uploaded document for attaching the document to get a signature.
You can upload docs either via the local system, one drive, google drive, box, or Dropbox,, or use the created template.
Document types acceptance- word, pdf, excel, ppt, jpg, png.
You can attach multiple documents here.
Scroll down to add recipients for signing the documents, Click on the “add recipients” button for sharing the file with multiple users.
We can also upload CSV files for sharing the document with a large number of people using the option called “import bulk list”
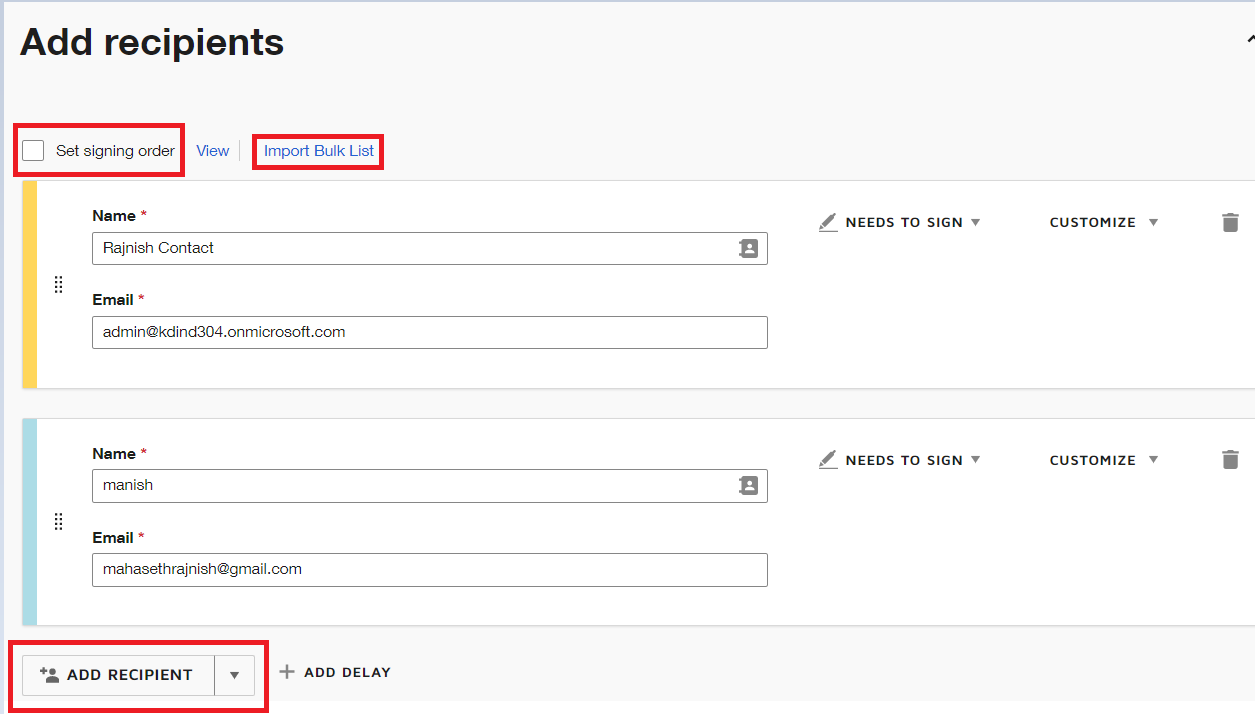
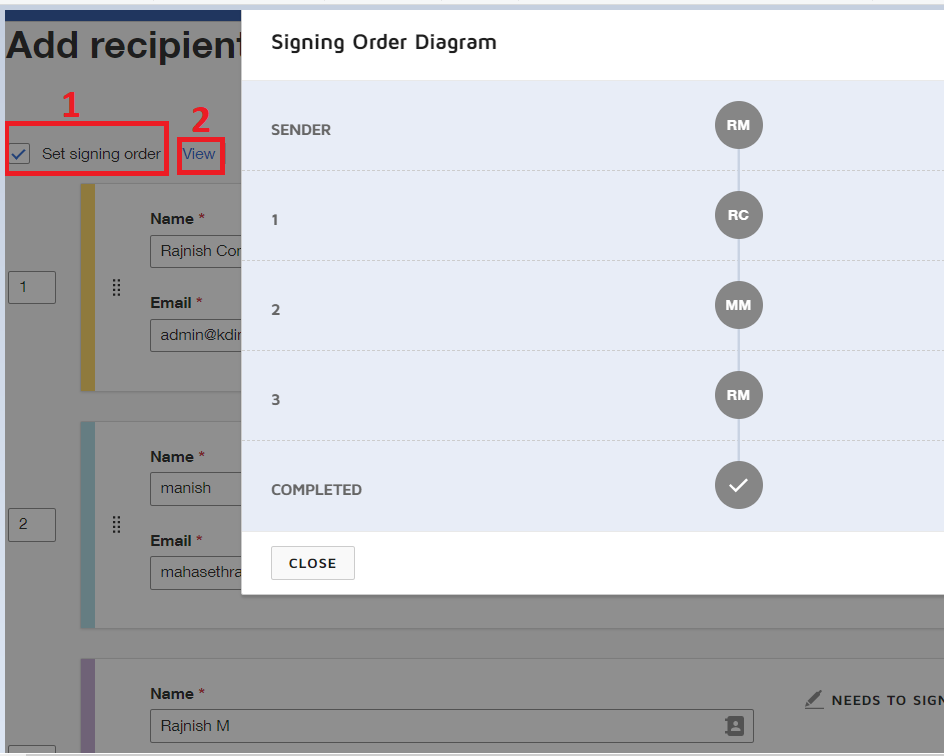
If we want the document to be signed in the order then we mark the “Set signing order” check box and click on view to see the order flow. Now the document won’t be accessible to other users until it’s completed by the previous user
If we want to send a document for signing after a certain period of completion from the 1st recipient then we can do this by clicking on the “add delay” button which is next to the “Add recipient” button. Scroll down for setting email message

We can put custom email subjects and messages for the recipients
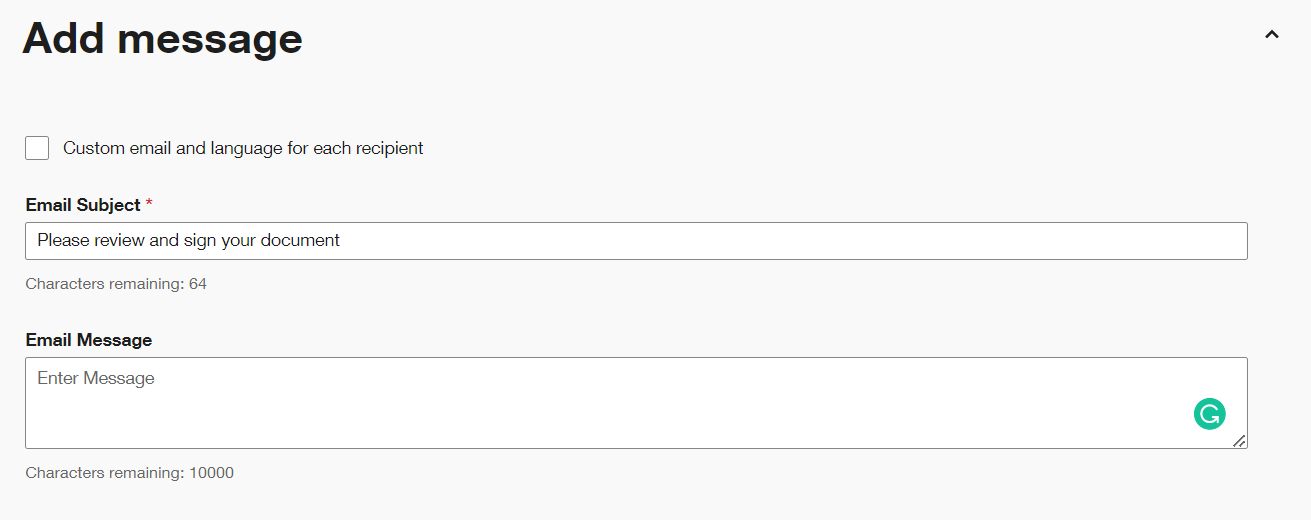
We can also send separate messages and subjects to different users. Mark the checkbox “custom email and language for each recipient”

Under the Customize field, we have the option of
Locking the document with a password or access code. We can put an access code so that only the right person can open and sign the document.
Adding Recipient's phone number for verification through OTP. Recipients will need to authenticate with their phone number via SMS or a phone call
We can add a private message for each recipient

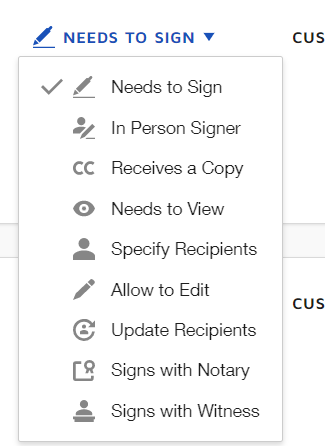
We can also put some conditions using the “Needs to Sign Option”
Scroll down and click on the Next button. We can schedule to send the document at a specified time using the Send Later option. You’ll be navigated to a new site

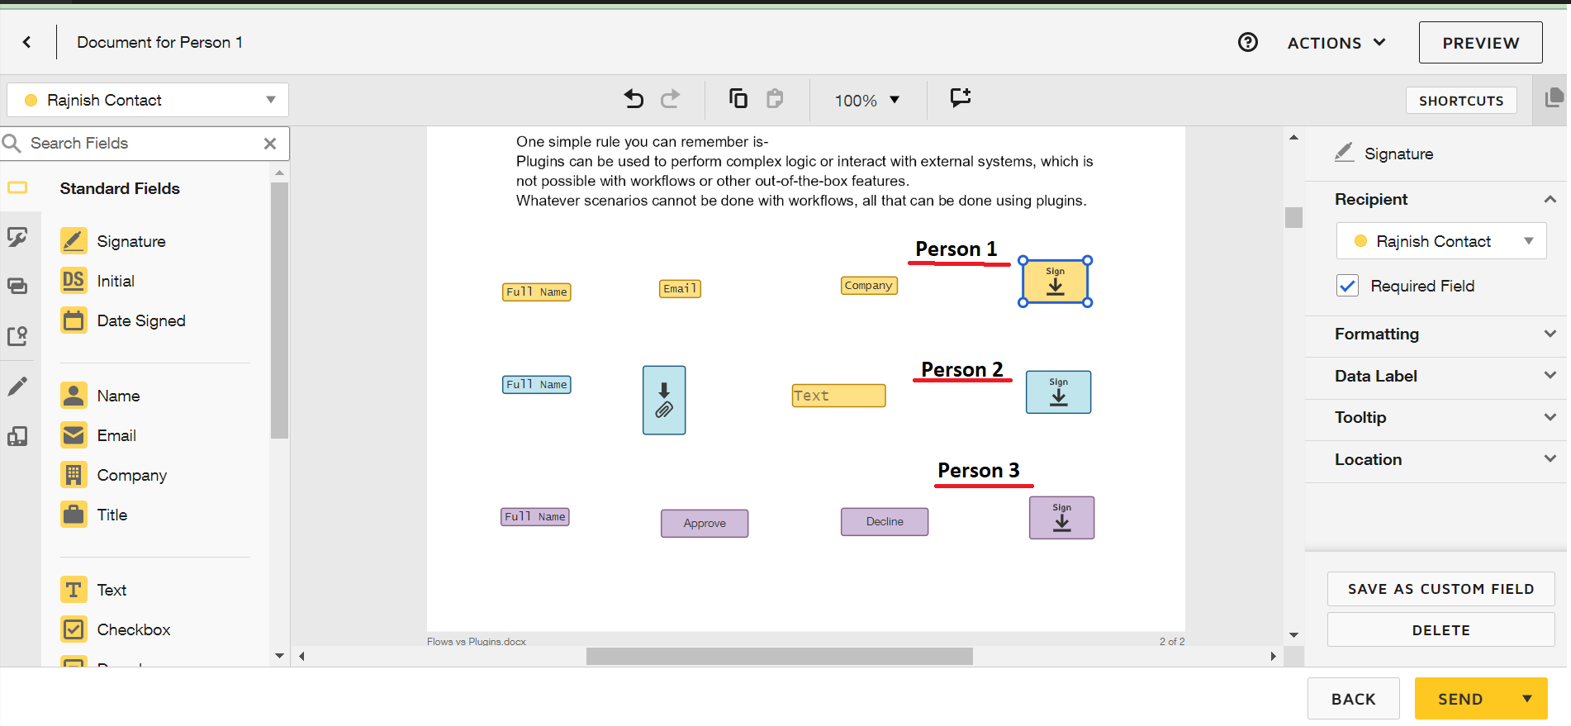
Here we can add the fields like a signature, name, email, company, etc available on the left pane and we can create a custom field and put it in the document. We can make the fields as required, optional, or read-only and can add a tooltip for fields.
We can get details/signatures of multiple users in the same document as shown below.
The person cannot see the fields available for person 2. Person 2 will be able to see the fields available for Person 1. The person will be able to see the fields available for persons 1 and 2.
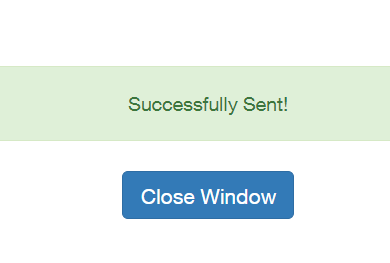
Click on the send button at the bottom and documents will be sent to the recipients.
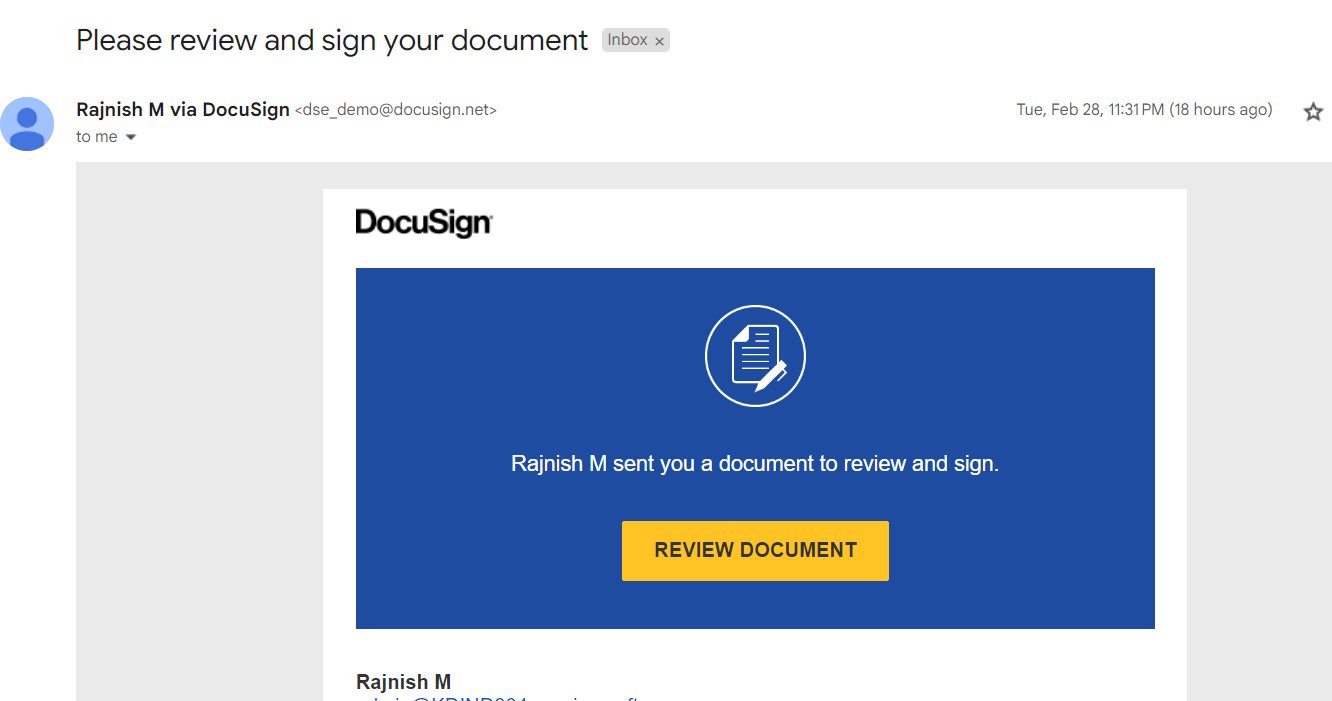
Recipients will get mail with a link to sign the document like below with the default subject -Please review and sign your document. We can customize the email subject and messages.
Once the user completes filling in the details in the document then the admin will get a mail with a signed copy of the documents like below

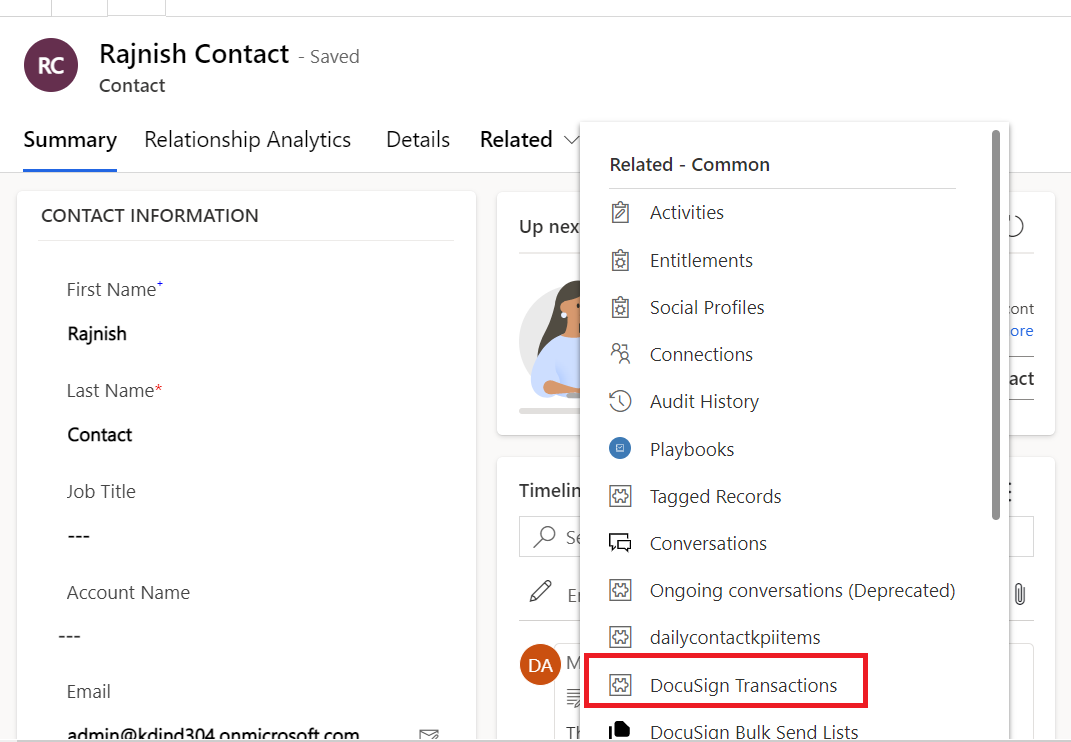
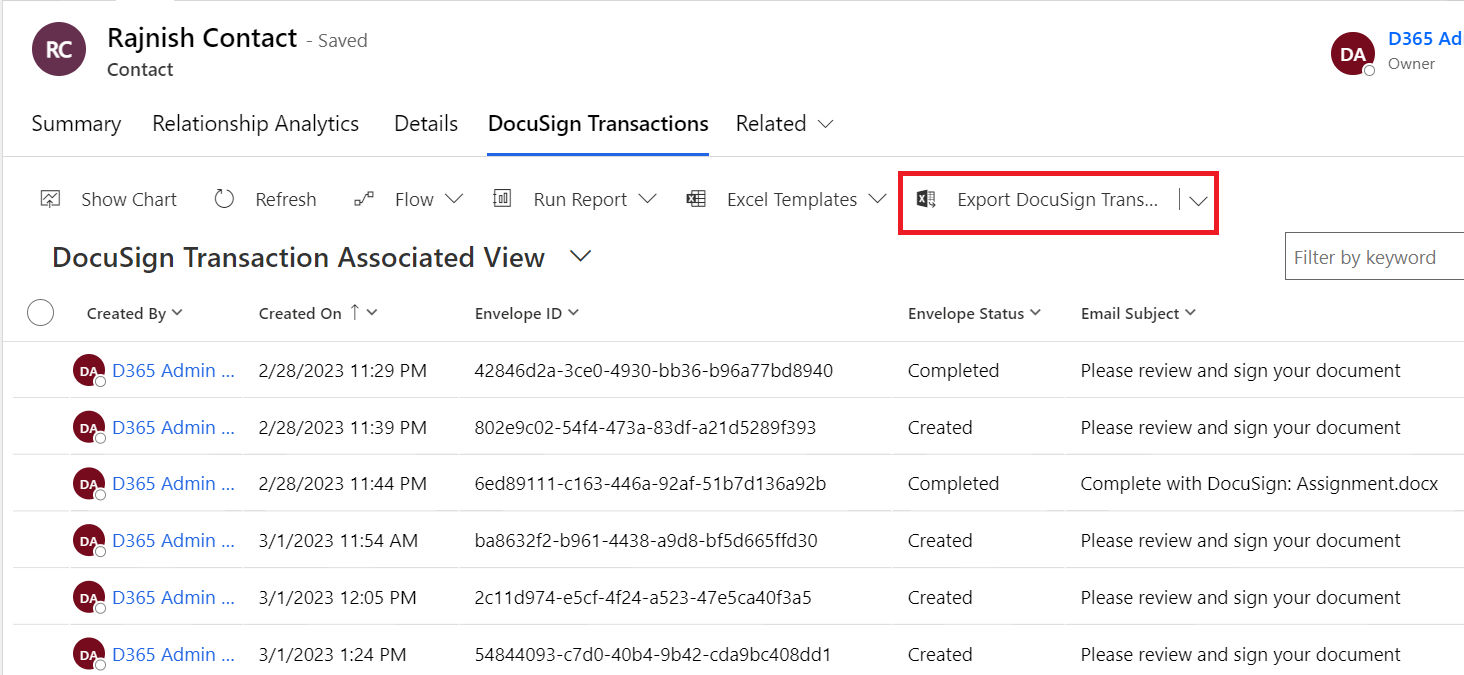
To see all the documents sent to a particular and their status we need to open “DocuSign Transactions” under the related dropdown of the record.
We can export all the DocuSign transactions using an export button and save the file. The file will be containing document information like- email subject, status, created on, created by, etc


No comments:
Post a Comment