Q. How to create Create Sales Trial Instance in Dynamics 365?
Follow the below video to see the full implementation-
A trial instance refers to a temporary environment that allows users to explore and evaluate the features and capabilities of the Dynamics 365 applications It's a way for organizations to test the software, understand its functionality, and determine if it meets their specific business needs before deciding to subscribe to a paid version.
This lets them understand how the program functions and if it fits their needs before they decide to pay for it. They can play around with it, learn how it works, and decide if they want to use it for their real work. It's like a "try before you buy" opportunity for businesses to make sure they're making the right choice.
Note- As trials are limited to 30 days, it's advisable to wait until you have sufficient time to dedicate to working within the trial.
Prerequisites: To set up a Dynamics 365 trial, you'll require a Microsoft account. If you don't have an existing Microsoft account or wish to create a new one, you can begin the process on the official Microsoft website.
Explore various modules available in the free trial version. You can access all of them right here URL - https://trials.dynamics.com/
Creating a Trial Instance in Dynamics 365
Follow these detailed steps to set up a trial instance in Dynamics 365:
Step 1: Start by opening your web browser and click on the following link to access the Dynamics 365 Marketing Home Page: Link here This link will take you to the main page where you can initiate the trial setup process.
Step 2: On the Dynamics 365 Trial Home Page, locate and click on the "Try for free" option under Sales Module. This will be a clickable button or link that's designed to start the trial registration process.
Step 3: You'll be prompted to provide your email address. It's important to use your Microsoft account ID for this step. Note that non-Microsoft email accounts won't be accepted for the trial. Once you've entered your Microsoft account email, click on the "Start your free trial" button to proceed.
Step 4: After clicking the "Start your free trial" button, you'll be asked to enter the password associated with your Microsoft account. This is a security measure to ensure the authenticity of your request. Once you've entered your password, click on the "Sign in" button. After signing in, you might need to click "Submit" to confirm your information.
Step 5: Now it's time to add your personal information. Fill out the form with the required details about yourself. This information might include your name, contact information, and any other necessary details. Once you've completed the form, click "Next" to proceed.
Step 6: After submitting the form, you'll be directed to a new page. Here, you'll receive a confirmation that Microsoft is in the process of creating your trial instance. This might take a moment.
Step 7: Once the trial instance is fully created, you'll see an option to "Launch Trial." Click on this option to access your newly created Dynamics 365 Sales trial instance.
Step 8: Congratulations! Your Dynamics 365 Sales trial instance is now accessible and ready for use. You can begin exploring the features and functionalities offered by Dynamics 365 to support your work and business needs.
By following these detailed steps, you'll successfully create a trial instance of Dynamics 365 Sales and be on your way to utilizing its capabilities for your tasks and projects.
Q. What is PowerApps Component Framework (PCF) and how to use the PCF in Power Apps?
Follow the below video to see the implementation, advantages, etc in detail-
PowerApps Component Framework (PCF) is a development framework provided by Microsoft for building custom components in Power Apps
With PCF, developers can create reusable and fully customizable UI components that can be used in canvas apps, model-driven apps, and even
in Dynamics 365 applications. These components can be integrated seamlessly into the app's interface, providing enhanced functionalities and
user experiences.
PCF is a powerful tool for extending the capabilities of Power Apps and helps us in delivering more specific business requirements
Code components are a type of solution component, which means they can be included in a solution file and imported into different environments.
You can include code components in a solution and then import the solution into an environment. Once the solution containing code components
is imported, system administrators and system customizers can configure columns, subgrids, views, and dashboard subgrids to use in place of
default components. You can add these code components to both model-driven and canvas apps.
How is it different from web resources?
Unlike HTML web resources, code components are rendered as part of the same context and loaded at the same time as any other components, providing a seamless experience for the user.
You can create code components that can be used across the full breadth of Power Apps capabilities, and reuse these components many times across different tables and forms.
Developers can bundle all the HTML, CSS, and TypeScript files into a single solution package file and move across environments, and also make it available via AppSource
Advantages of PowerApps Component Framework:
Customization: PCF allows developers to create highly customized components tailored
to specific business needs. This level of customization is not easily achievable with out-of-
the-box controls.
Reusability: PCF components can be built once and reused across multiple apps and
even by other developers. This promotes code sharing and reduces development time.
Seamless Integration: PCF components integrate smoothly with the overall app experience,
making them appear native and consistent with other elements in the application.
Improved Performance: PCF components are lightweight and efficient, resulting in better app
performance compared to some third-party controls.
Enhanced User Experience: By creating purpose-built components, developers can improve
the user experience, leading to increased user engagement and productivity.
Cross-platform Compatibility: PCF components can be used in both web and mobile apps,
making them versatile and suitable for various devices.
Cross-platform Compatibility: PCF components can be used in both web and mobile apps,
making them versatile and suitable for various devices.
Extensibility: PCF allows developers to extend the capabilities of Power Apps by adding
functionalities not available in the default controls.
Prerequisites for developing code component
Visual Studio code
node.js
Power Platform CLI
dotnet build tools
1. VS Code Terminal
Pac- it’spower platformm CLI command to configure the PCF as well You can see the PCF in the list
pac PCF init --namespace GlowingText --name GlowingText --template field
PCF- creating a component, init- initializing and giving the name as GlowingText and component name as GlowingText too
npm install- it’ll take time so let me show you the structure meanwhile.
We have the 'index.ts file, where we write the code for our PCF component. This TypeScript file includes
methods like 'init,' 'update view,' 'get outputs,' and 'destroy' that handle various aspects of the component's lifecycle.
The Manifest file includes metadata, properties, resources, and usage information. It defines parameters, such as sample properties and types. It also specifies feature usage, like utility and web API.
We will create css folder to make the text glow later
we have the 'CSS' folder, containing the 'glow.css' file. This file holds the CSS code responsible for creating the glowing effect on the text.
The animation class 'glow' is applied to the 'glow' element, and the colors are defined to create the desired animation effect.
npm run build- to build the project
npm start watch - The 'npm start watch' command helps us test the component in the browser,
rendering our PCF control with the properties defined in the 'Manifest file.'
Now PCF page should open in the browser after this command
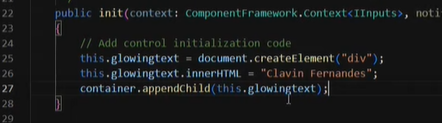
Step 1----Open index.ts -Save -Name should show on the page
add to 3 line- Will create an HTMLElement variable
public glowingKervtext :HTMLElement;
Let’s initialize it in init method- add below line in public init 23
// Add control initialization code
this.glowingKervtext = document.createElement("div"); -initializing element
this.glowingKervtext.innerHTML = "Kerv Digital"; - setting the inner text of the element
container.appendChild(this.glowingKervtext); - appending to main container to reflect name of page
Dynamix Power name should show on the screen.
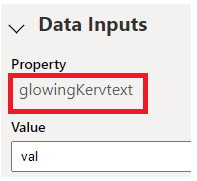
Now on the property, it’s showing a sample property
Let’s change the name to glowingKervtext. We can configure this in the Manifest file
Open the Manifest file and change the property name to to
Now the property name is showing as glowingKervtext on the page
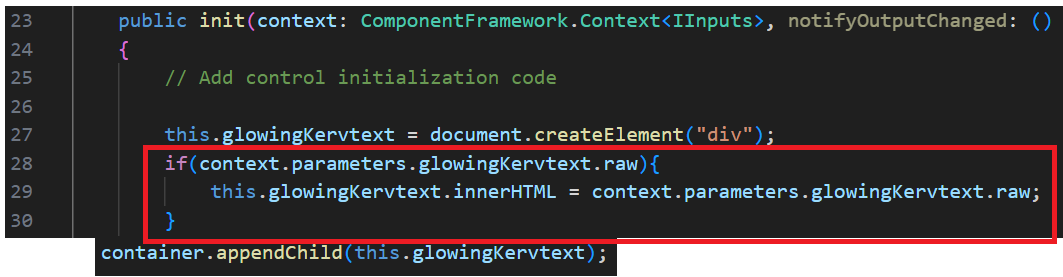
But if you change the value, the name is not getting updated. In order to update the name, we need to write the
code for updating the name inside the index file
if(context.parameters.glowingKervtext.raw){ - Getting the property from Manifest file
this.glowingKervtext.innerHTML = context.parameters.glowingKervtext.raw; - showing the value dynamically from textbox
}
Now different name is showing on the page when the page load but not exactly when the value is changed, right.
It’s showing when the page is refreshed
Let’s update the value immediately when the text value changes
Copy the above code and paste in the update method. Name should change instantly
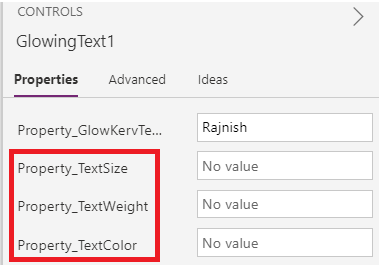
Now whenever we’re writing any text, we want to set some other properties also- Size, color, and
weight. etc. (Below image is from the Canvas app)
We need to repeat the step which we did while setting text property in the Manifest file so let’s set that again
Check the page, these properties should be visible on screen
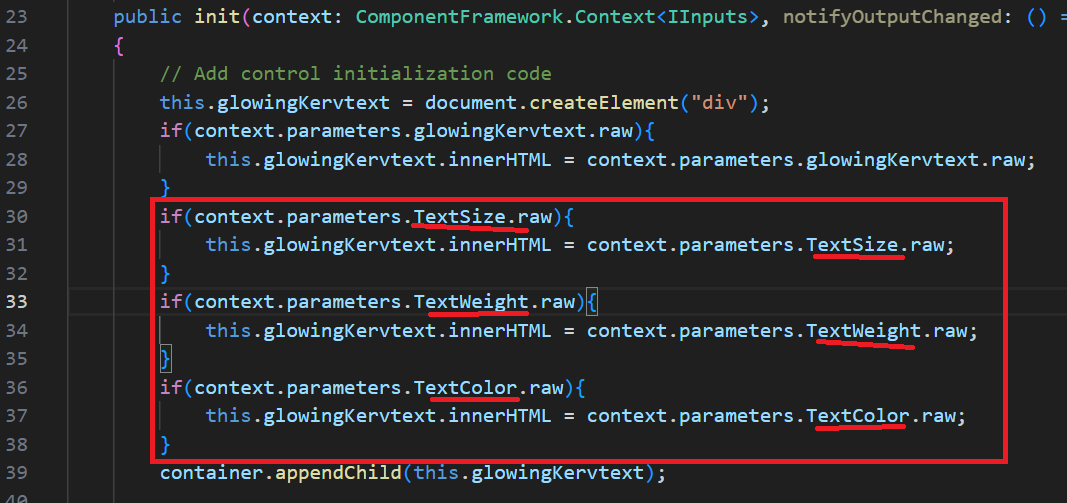
Let’s set the property for them in the index file for
Copy the above line and paste it again and again, and change the property name
Update view
similarly, I can take this whole bunch and I want I can copy it in the update view because
I want these properties to be updated whenever something changes
Save- Now go to the browser and enter text size 70, and text weight bold.
Let's make the text glow now using CSS
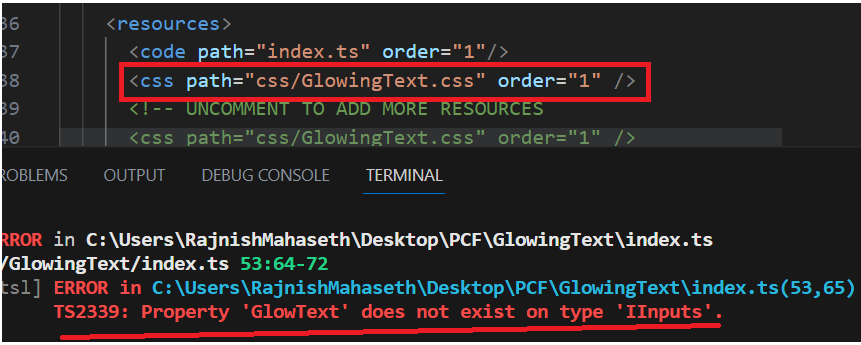
goto Manifest..under resources
Css folder doesn't exist so it'll throw an error.
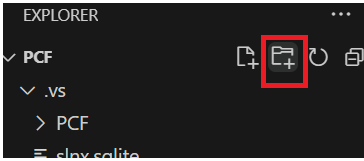
Add a new folder and give name css
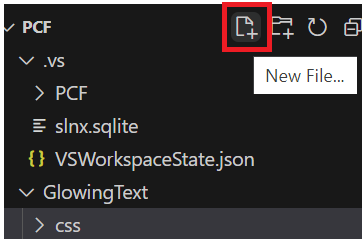
Add a file for css and give name as GlowingText.css
So we need to add the CSS element to index.ts above and append in the init method
this.glowingKervtext.classList.add("glow");
Text should glow now
Our code component is now ready. We can make a package of this code component and keep it in a solution.
In terminal– ctrl+C
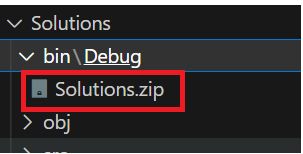
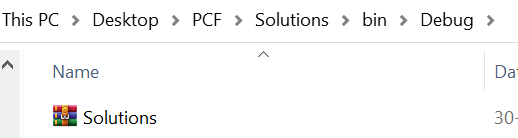
Create a folder - mkdir Solutions
cd .\Solutions\
Let's initialize the solution now (PCF control actually is a solution it is packaged in a solution that's why it's easy
to manage all the CSS all the JavaScript all the node packages will be in a solution)
In terminal-pac
pac solution init –publisher–name developer –publisher-prefix dev
If it’s showing error then execute the same in cmd prompt