Q. What is PowerApps Component Framework (PCF) and how to use the PCF in Power Apps?
Follow the below video to see the implementation, advantages, etc in detail-
PowerApps Component Framework (PCF) is a development framework provided by Microsoft for building custom components in Power Apps
With PCF, developers can create reusable and fully customizable UI components that can be used in canvas apps, model-driven apps, and even in Dynamics 365 applications. These components can be integrated seamlessly into the app's interface, providing enhanced functionalities and user experiences.
PCF is a powerful tool for extending the capabilities of Power Apps and helps us in delivering more specific business requirements
Code components are a type of solution component, which means they can be included in a solution file and imported into different environments.
https://learn.microsoft.com/en-us/power-apps/developer/component-framework/custom-controls-overview
You can include code components in a solution and then import the solution into an environment. Once the solution containing code components is imported, system administrators and system customizers can configure columns, subgrids, views, and dashboard subgrids to use in place of default components. You can add these code components to both model-driven and canvas apps.
How is it different from web resources?
Unlike HTML web resources, code components are rendered as part of the same context and loaded at the same time as any other components, providing a seamless experience for the user.
You can create code components that can be used across the full breadth of Power Apps capabilities, and reuse these components many times across different tables and forms.
Developers can bundle all the HTML, CSS, and TypeScript files into a single solution package file and move across environments, and also make it available via AppSource
Advantages of PowerApps Component Framework:
Customization: PCF allows developers to create highly customized components tailored to specific business needs. This level of customization is not easily achievable with out-of- the-box controls.
Reusability: PCF components can be built once and reused across multiple apps and even by other developers. This promotes code sharing and reduces development time.
Seamless Integration: PCF components integrate smoothly with the overall app experience, making them appear native and consistent with other elements in the application.
Improved Performance: PCF components are lightweight and efficient, resulting in better app performance compared to some third-party controls.
Enhanced User Experience: By creating purpose-built components, developers can improve the user experience, leading to increased user engagement and productivity.
Cross-platform Compatibility: PCF components can be used in both web and mobile apps, making them versatile and suitable for various devices.
Cross-platform Compatibility: PCF components can be used in both web and mobile apps, making them versatile and suitable for various devices.
Extensibility: PCF allows developers to extend the capabilities of Power Apps by adding functionalities not available in the default controls.
Prerequisites for developing code component
Visual Studio code
node.js
Power Platform CLI
dotnet build tools
1. VS Code Terminal
Pac- it’spower platformm CLI command to configure the PCF as well
You can see the PCF in the listpac PCF init --namespace GlowingText --name GlowingText --template field
PCF- creating a component, init- initializing and giving the name as GlowingText and component name as GlowingText too
npm install- it’ll take time so let me show you the structure meanwhile.
We have the 'index.ts file, where we write the code for our PCF component. This TypeScript file includes methods like 'init,' 'update view,' 'get outputs,' and 'destroy' that handle various aspects of the component's lifecycle.
The Manifest file includes metadata, properties, resources, and usage information. It defines parameters, such as sample properties and types. It also specifies feature usage, like utility and web API.
We will create css folder to make the text glow later
we have the 'CSS' folder, containing the 'glow.css' file. This file holds the CSS code responsible for creating the glowing effect on the text. The animation class 'glow' is applied to the 'glow' element, and the colors are defined to create the desired animation effect.
npm run build- to build the project
npm start watch - The 'npm start watch' command helps us test the component in the browser, rendering our PCF control with the properties defined in the 'Manifest file.'
Now PCF page should open in the browser after this command
Step 1----Open index.ts -Save -Name should show on the page
add to 3 line- Will create an HTMLElement variable
public glowingKervtext :HTMLElement;

Let’s initialize it in init method- add below line in public init 23
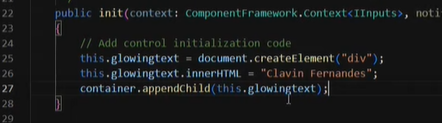
// Add control initialization code
this.glowingKervtext = document.createElement("div"); -initializing element
this.glowingKervtext.innerHTML = "Kerv Digital"; - setting the inner text of the element
container.appendChild(this.glowingKervtext); - appending to main container to reflect name of page
Dynamix Power name should show on the screen.
Now on the property, it’s showing a sample property

Let’s change the name to glowingKervtext. We can configure this in the Manifest file
Open the Manifest file and change the property name to to
<property name="glowingKervtext" display-name-key="Property_GlowKervText" description-key="Property_GlowKervText" of-type="SingleLine.Text" usage="bound" required="true" />
Now the property name is showing as glowingKervtext on the page
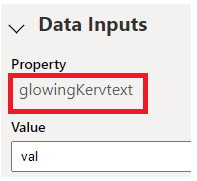
But if you change the value, the name is not getting updated. In order to update the name, we need to write the code for updating the name inside the index file
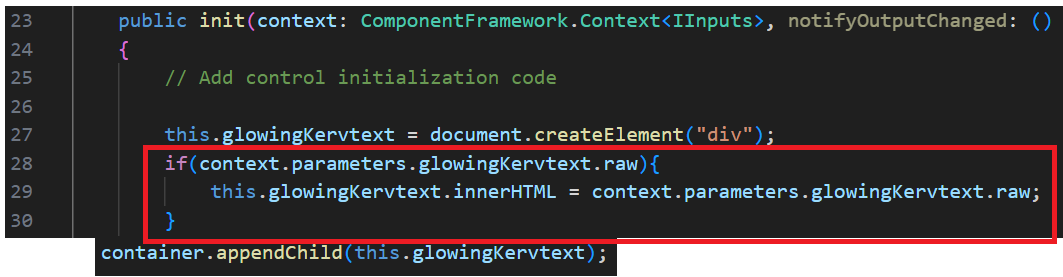
if(context.parameters.glowingKervtext.raw){ - Getting the property from Manifest file
this.glowingKervtext.innerHTML = context.parameters.glowingKervtext.raw; - showing the value dynamically from textbox
}
Now different name is showing on the page when the page load but not exactly when the value is changed, right. It’s showing when the page is refreshed
Let’s update the value immediately when the text value changes
Copy the above code and paste in the update method. Name should change instantly

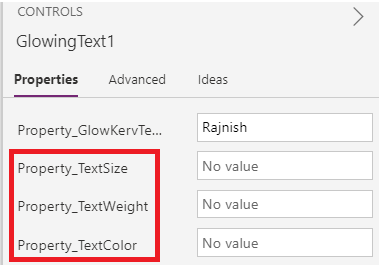
Now whenever we’re writing any text, we want to set some other properties also- Size, color, and weight. etc. (Below image is from the Canvas app)
We need to repeat the step which we did while setting text property in the Manifest file so let’s set that again
<property name="glowingKervtext" display-name-key="Property_GlowKervText" description-key="Property_GlowKervText" of-type="SingleLine.Text" usage="bound" required="true" />
<property name="TextSize" display-name-key="Property_TextSize" description-key="Property_TextSize" of-type="SingleLine.Text" usage="input" required="true" />
<property name="TextWeight" display-name-key="Property_TextWeight" description-key="Property_TextWeight" of-type="SingleLine.Text" usage="input" required="true" />
<property name="TextColor" display-name-key="Property_TextColor" description-key="Property_TextColor" of-type="SingleLine.Text" usage="input" required="true" />

Check the page, these properties should be visible on screen

Let’s set the property for them in the index file for
Copy the above line and paste it again and again, and change the property name
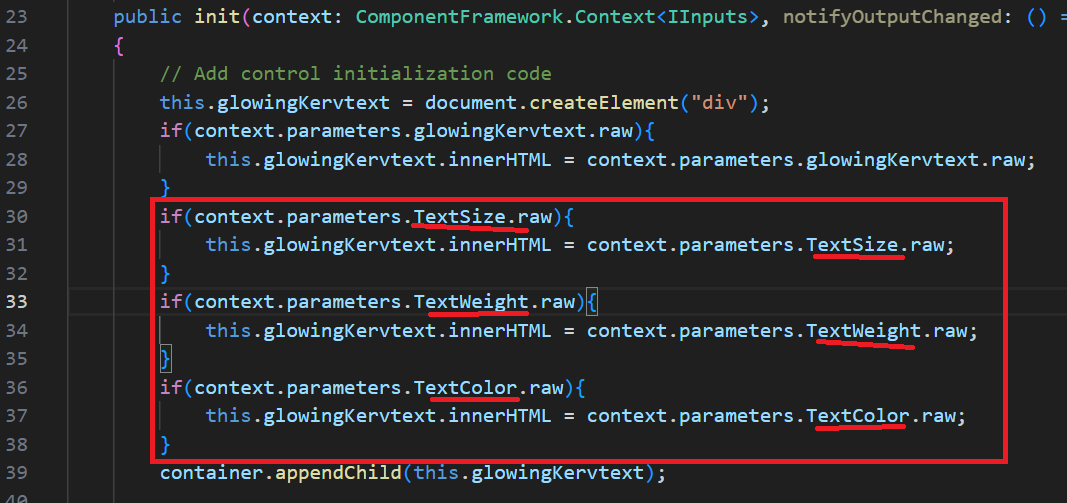
Update view
similarly, I can take this whole bunch and I want I can copy it in the update view because I want these properties to be updated whenever something changes

Save- Now go to the browser and enter text size 70, and text weight bold.
Let's make the text glow now using CSS
goto Manifest..under resources
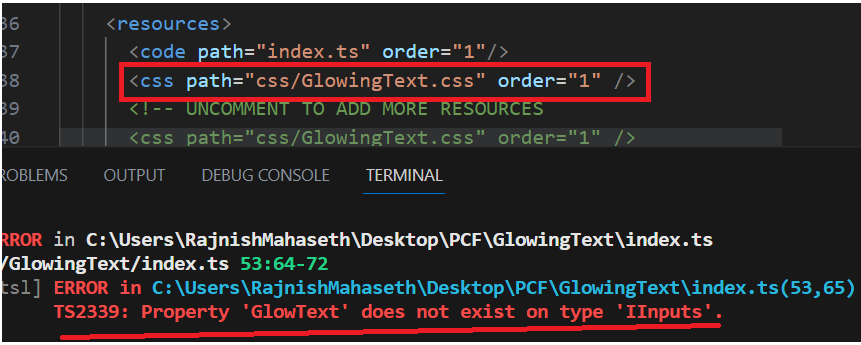
Css folder doesn't exist so it'll throw an error.
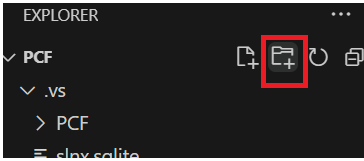
Add a new folder and give name css
Add a file for css and give name as GlowingText.css

Add below code to GlowText.css
.glow {
-webkit-animation: glow 1s ease-in-out infinite alternate;
-moz-animation: glow 1s ease-in-out infinite alternate;
animation: glow 1s ease-in-out infinite alternate;
}
@keyframes glow {
from {
text-shadow: 0 0 10px #fff, 0 0 20px #fff, 0 0 30px #e60073, 0 0 40px #e60073, 0 0 50px #e60073, 0 0 60px #e60073, 0 0 70px #e60073;
}
to {
text-shadow: 0 0 20px #fff, 0 0 30px #4d68ff, 0 0 40px #ff4da6, 0 0 50px #ff4da6, 0 0 60px #ff4da6, 0 0 70px #ff4da6, 0 0 80px #ff4da6;
}
}
(IT MAY NOT REFLECT SO LET'S BUILD THE NPM AGAIN)
in terminal--> ctrl+C then Y
npm run build
npm start watch
still it's not rendering the CSS
So we need to add the CSS element to index.ts above and append in the init method
this.glowingKervtext.classList.add("glow");
Text should glow now
Our code component is now ready. We can make a package of this code component and keep it in a solution.
In terminal– ctrl+C
Create a folder - mkdir Solutions
cd .\Solutions\
Let's initialize the solution now (PCF control actually is a solution it is packaged in a solution that's why it's easy to manage all the CSS all the JavaScript all the node packages will be in a solution)
In terminal-pac
pac solution init –publisher–name developer –publisher-prefix dev
If it’s showing error then execute the same in cmd prompt

The solution is initialized now
Let’s add the reference to this project now
pac solution add-reference --path "C:\Users\RajnishMahaseth\Desktop\PCF"

ms build /t:build /restore (for the first, next time just ms build)
(In case of error-'msbuild' is not recognized as an internal or external command, operable program or batch file.

Now, it will take some time, and the build success message should appear on the cmd prompt
Check-in VS code, solution zip should have been added now. Our PCF solution is ready now. Let's import this solution to CRM env
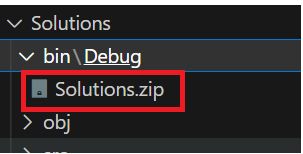
Our PCF solution is ready now. Let's import this solution to CRM env.
(select below path while importing)
We will see the implementation of this PCF in both the Canvas app and model-driven app.
By default, PCF is enabled in MDA but we need to enable it manually for the canvas app.
Gp to admin center→ Go to env→ Select env and click on settings→ Product→ Features
Check power app component on the right side and enable it–Save

Publish all customization after solution import. Now anyone can use this PCF in that env
Create canvas app
Click on + to create a new control
Click on Get more components, click on code and select your PCF code component

References-
https://learn.microsoft.com/en-us/power-apps/developer/component-framework/custom-controls-overview


No comments:
Post a Comment