Q. How to enable Share point in Dynamics 365 -
Use case- when anyone uploads a document in Dynamics it should reflect in Share point and when you delete, modify, or add any file in SharePoint then it should reflect in Dynamics 365. Changes should be reflected vice-versa.
You can see how the integration is done by following the below video as well -SharePoint is a popular document management and collaboration platform from Microsoft, and it can be integrated with Dynamics 365 to enhance document management and collaboration capabilities within the Dynamics 365 environment.
With SharePoint integration, users can easily create and store documents in SharePoint directly from within Dynamics 365, and they can also access and collaborate on those documents with other users within their organization. The integration allows users to manage documents in a centralized location and share them securely with team members or external partners.
In addition, the integration provides enhanced security and compliance features, such as document-level permissions, version control, and audit trails. These features ensure that documents are secure and compliant with industry regulations.
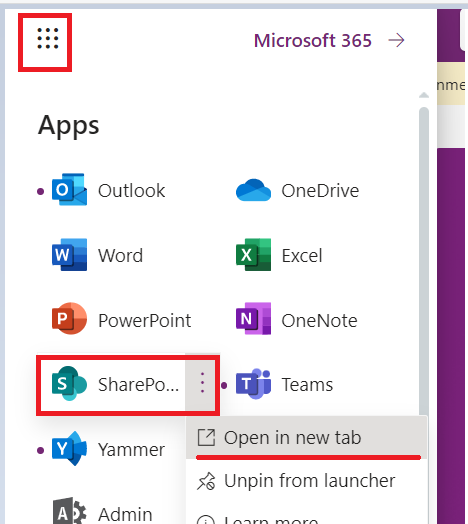
Click on navigation and open Sharepoint in a new tab
Click on Create a site (choose any type), fill in the mandatory details, click Next, and finish.

Click on Site contents and copy the URL

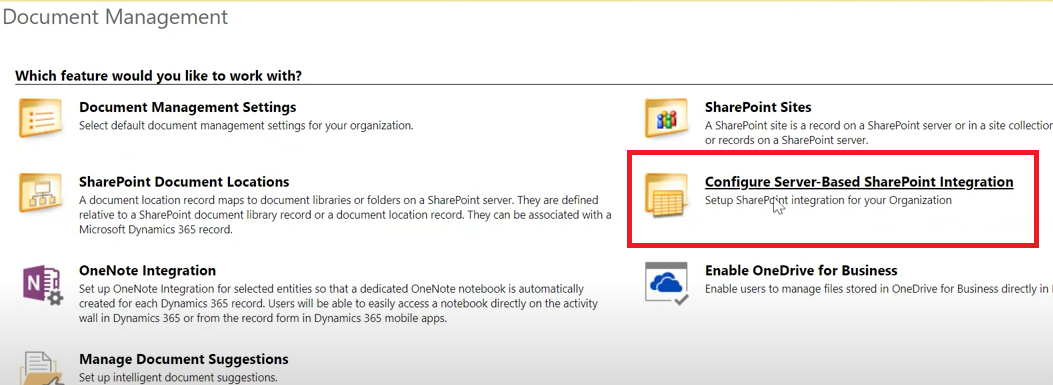
Go to advanced setting in Dynamics 365, go to Setting→Document Management

Click on “Server-Based Configuration Sharepoint Integration”
Select Online in the popup window and click Next. Paste the URL from step 3, click next, and finish.
(e.g URL https://test304.sharepoint.com/sites/DEMOPROJECT/)

Go to D365→Setting→Document Management Setting(under System) → Click on Document Management Setting and select the entity for which you want to integrate document uploading.
Paste the same URL from the step 3 URL box then click next

Click Next

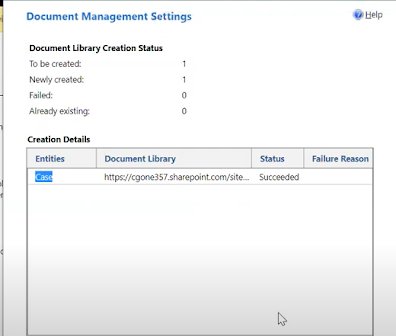
Click OK on the dialogue box. You’ll get a success message after this step. Click on Finish.

The integration part is done.
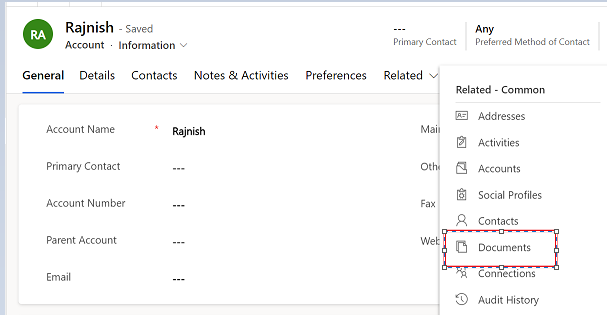
We can open a new account in the model-driven app and upload documents to check if it’s showing in SharePoint as well or not.
Open model-driven app→Create new Account and save→ Upload any document then save again
Note - Naming should avoid using the below special characters- # % & * + . \ / < > ? { }
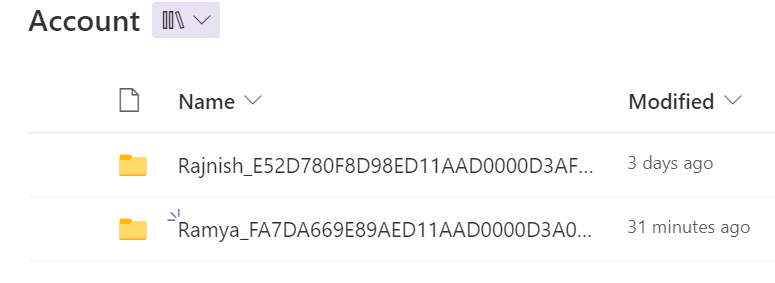
Go to your SharePoint site and click on Site contents and open the account folder

Open any one of the accounts, and you’ll be able to see the uploaded documents p]of that account


No comments:
Post a Comment