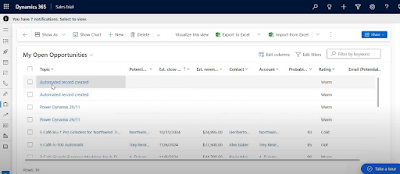
Trigger Power Automate on Button Click in Dynamics 365 Using JavaScript
In this blog, we’ll explore how to integrate Microsoft Dynamics 365 with Power Automate by triggering a flow from a custom button click on a Dynamics 365 form. We’ll walk through a scenario in where we'll integrate Power Automate, Ribbon Workbench, and JavaScript to automate workflows. Our goal is to create a button on the Opportunity form that triggers a Power Automate Flow to perform actions such as sending an approval email, notifying a manager , creating a new record, etc.
Code link - Download here
Scenario Overview
- Objective: Add a custom button on the Opportunity form that triggers a Power Automate flow.
- Use Case: When the button is clicked, the flow performs an action, such as creating a record or notifying a manager.
- Tools Required: Dynamics 365 environment, Ribbon Workbench, JavaScript, Power Automate.
Steps to Implement
1. Set Up the Environment
Open your Dynamics 365 environment and create a new solution.
Add the Opportunity table to this solution without additional metadata. This ensures compatibility with the Ribbon Workbench.
2. Install Ribbon Workbench
Download link - here
Import the Ribbon Workbench solution into your environment.
Open Ribbon Workbench and load your solution.
3. Create the Custom Button
In Ribbon Workbench, navigate to the Opportunity form command bar.
Add a new button and name it (e.g., Send Notification or Trigger Flow).
Attach a command to the button to ensure it executes an action.
4. Design Power Automate Flow
Create a new Cloud Flow in Power Automate with the trigger When an HTTP request is received.
Add a step to perform an action, such as creating a record in the Opportunity table.
Save the flow to generate the unique HTTP URL endpoint.
Step-by-Step Configuration
Add HTTP Trigger to Your Flow:
- Select the "When an HTTP request is received" trigger as the starting point of your flow.
- Change Who can trigger the flow to Anyone
Define the JSON Schema: Use the following schema to validate and parse the incoming data:
{
    "type": "object",
    "properties": {
        "currentRecordId": {
            "type": "string"
        }
    }
}
Save and Copy the Trigger URL:

5. Write JavaScript for Button Action
In Dynamics 365, create a JavaScript web resource and add the following code:
--JavaScript Code--
if (typeof (DYNAMIX) === "undefined") {
    DYNAMIX = {
        __namespace: true
    };
}

DYNAMIX.Opportunity = {
    onClickOfButton: function (formContext) {
        try {
            // Get the current Opportunity record's ID
            var currentRecordId = formContext.data.entity.getId();

            // Power Automate HTTP trigger URL
var url = "https://prod-178.westus.logic.azure.com:443/workflows/84a93f480de14890856d9985d58d4433/triggers/manual/paths/invoke?api-version=2016-06-01&sp=%2Ftriggers%2Fmanual%2Frun&sv=1.0&sig=_YwUGubAHDL5xciZZUZEhvfYNgs3BfR584GlOtU9LHI";
            // Create and configure XMLHttpRequest
            var req = new XMLHttpRequest();
            req.open("POST", url, true);
            req.setRequestHeader('Content-Type', 'application/json');

            req.onreadystatechange = function () {
                if (this.readyState === 4) {
                    req.onreadystatechange = null;

                    if (this.status === 202) { // If request is accepted
                        console.log("success");

                        // Show confirmation popup
                        var alertStrings = {
                            confirmButtonLabel: "Ok",
                            text: "Created Opportunity Record Successfully",
                            title: "Request Submitted"
                        };
                        var alertOptions = {
                            height: 120,
                            width: 260
                        };
                        Xrm.Navigation.openAlertDialog(alertStrings, alertOptions).then
(function(success) {
console.log("Alert dialog closed");
}, function(error) {
console.log(error.message);
});
} else {
console.log(this.statusText); // Log any errors
}
}
};
// Send the current record ID to Power Automate
req.send(JSON.stringify({currentRecordId}));
console.log(JSON.stringify(currentRecordId));
} catch (error) {
console.error(error); // Handle unexpected errors
}
},
};
6. Attach JavaScript to the Button
- In Ribbon Workbench, open the command associated with your button.
- Add a JavaScript action, selecting the web resource and function name (
Dynamics.Opportunity.onClickOfButton). - Add a CRM Parameter with value
PrimaryControl.
Dynamics.Opportunity.onClickOfButton).PrimaryControl.7. Publish and Test
- Publish the changes in Ribbon Workbench.
- Go to the Opportunity form and refresh it.
- Test the button to ensure it triggers the flow and performs the expected action

How It Works
-
User Interaction:
- The user clicks the button on the Opportunity form.
-
JavaScript Execution:
- The JavaScript code retrieves the current Opportunity record's ID.
- Sends an HTTP POST request with the record ID to the Power Automate endpoint.
-
Flow Execution:
- Power Automate receives the request and processes the flow.
- If the HTTP request is successfully accepted (
202), a confirmation popup is shown.
Conclusion
By combining Dynamics 365 with Power Automate and custom JavaScript, we can create seamless workflows triggered by user interactions.
Next video/blog - How to Send Approval mail to Manager on Button Click.


